

New Ceramic Surface Design is a fully-illustrated manual covering a wide range of creative surface decoration techniques presented in an approachable and accessible format. Ceramic artist and expert Molly Hatch guides beginners and more advanced ceramicists through various methods for creating designs on clay. You will be introduced to several different and new approaches for using your own imagery and content on the ceramic surface. Techniques include Mishima, tape resists, rubber stamping, and doodling to create line art, stamping, nature resists, found objects, and shellac resists to create textures, and sticker resists, contact paper stencils, paper resists, and Sgrafitto to create shaped designs. Detailed photography and hand-drawn illustrations document the processes and show beautiful completed samples. Templates and stencils for all the featured designs are included in the back of the book to use as is, or to tailor to your own tastes.
I also wanted to share a peek at a sample project from the book--check it out!
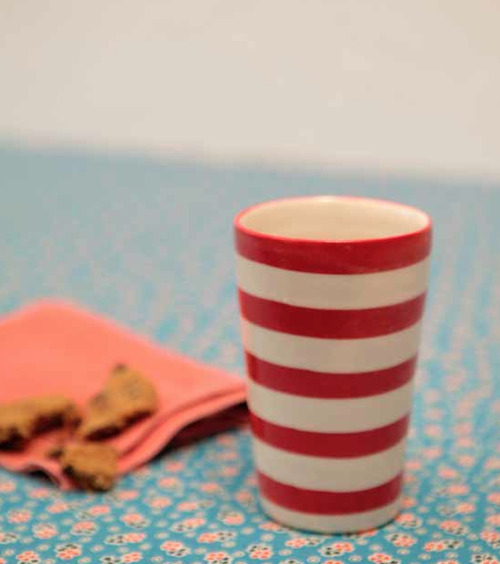
Tape Resist
New Ceramic Surface Design shows you a great technqiue to complete your clay projects utilizing easily accessible materials, like washi paper tape.
Masking tape, washi paper tape—these are easily accessible materials and make for a great surface decoration tool on bisque-fired ceramics. I prefer to use washi tape as a resist, because it is easy to tear from the roll and remove from the surface of the bisque without leaving a residue behind. Most often,
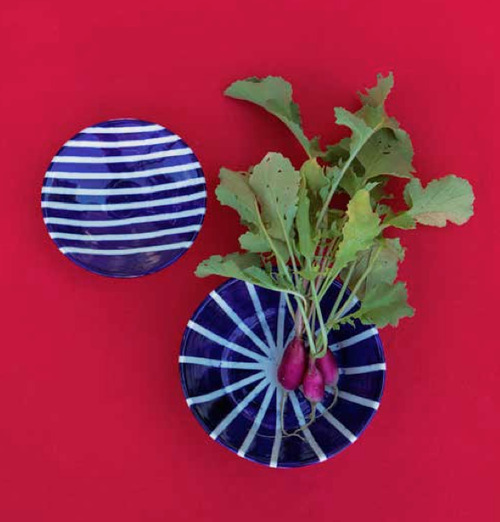
I use washi tape to create stripes in my work. It leaves a clean line with little
to no cleanup required. Using washi tape as a resist is an easy way to get a straight line or controlled curved line on the ceramic surface. Using tape as a resist in ceramics is similar to using painter’s tape when masking off edges on a wall when painting your home. Use it to block out areas of decoration or to designate a clear edge when decorating work. The uses for tape as a resist are infinite!
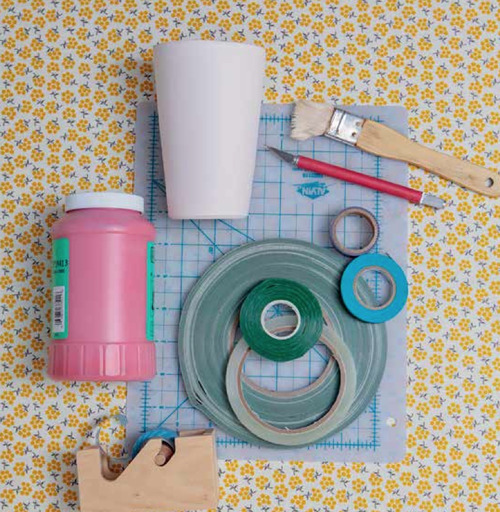
Tools
bisqued ceramic surface, sponge, pen-style craft knife, self-healing cutting mat, washi tape or masking tape, 1” (2.5 cm) paintbrush, underglaze, clear or tinted glaze

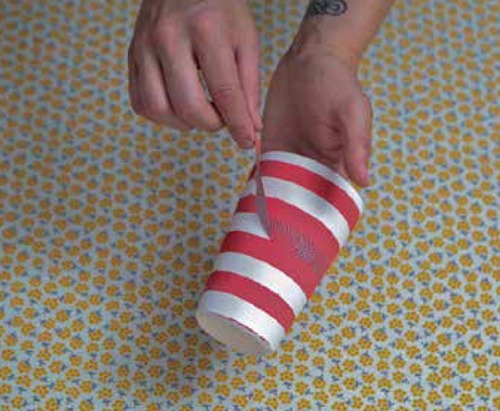
1. Clean your bisque piece with a damp sponge to remove any dust from the surface. This will help the tape stick nicely as well as prep the piece for adding underglaze and glaze.
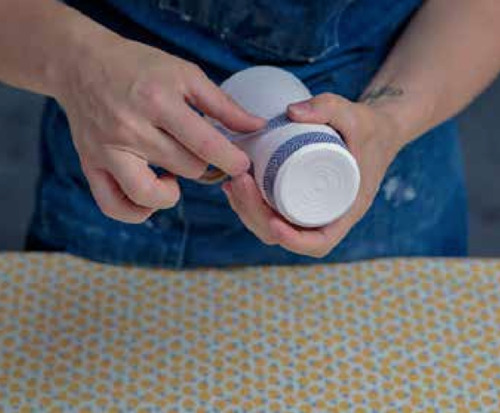
2. Using a craft knife and a cutting mat, cut a length of tape that will fit the length of the surface of the form that you wish to block. Trim the tape if needed. You are using the washi tape as a resist, so wherever you put it on the surface, it will prevent the underglaze from soaking into the clay.

3. When adhering the tape to the clean bisque, be sure to smooth the tape onto the ceramic surface carefully; it may buckle as it moves over the surface of a form. Wherever the tape buckles or creases, there is a good chance that underglaze will seep under the tape and require cleanup.
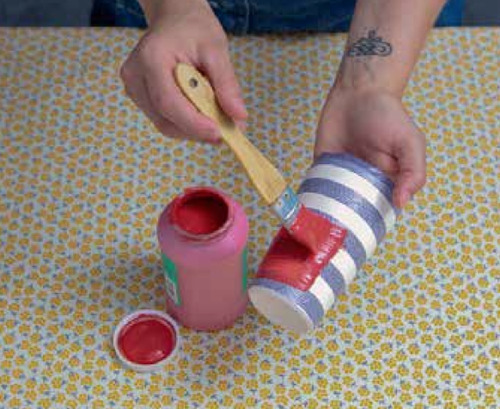
4. Once all of the tape is in place, use a paintbrush to apply your full-strength underglaze color over the surface of the bisque. Apply two or three coats of underglaze to achieve
5. Allow the underglaze to dry fully. Once dry, carefully re- move the tape to reveal the stripe! Finish the piece with a clear or tinted clear glaze.
Tip
Sometimes the underglaze gets beneath the tape, creating an irregular line. This can be a happy accident or a problem. If you would like to remove the extra underglaze, gently scrape the surface of the bisque using the tip of a craft knife blade or a spear-tipped sgraffito tool. This will easily remove the spots where the underglaze seeped beneath your tape.
Try it!
Try using the tape as you would use painter’s tape—to create a straight edge to a field of color. This can be a great way to color block on a form. You can also
try cutting a wavy shape into the tape for a clean line that isn’t as straight. You can get creative here. Alter the tape by cutting it into an asymmetric form. You could even create a grid or check pattern by layering the tape!
try cutting a wavy shape into the tape for a clean line that isn’t as straight. You can get creative here. Alter the tape by cutting it into an asymmetric form. You could even create a grid or check pattern by layering the tape!
No comments:
Post a Comment